Difficulty: EASY
I am no longer entertaining people asking me to create their Apple ID, please follow the steps below which is very easy or find another tut. Apple KB link at the end of this guide will take you to the same steps as well as how to do it on your device.

Advantages
1. Having an Apple ID let's you download any free or paid apps from App Store legally! There are thousands of them (More than what Android Market can offer)
2. Once you download the free app, you can sync it with itunes without any problems.
3. You can sync the app to any computer and idevice authorized by you.
4. You can take advantage of the iCoud service.
5. You can use any gift code given to you by a relative, friend or a code that you won from an online contest.
6. Best option for non-jailbreakers and for those who can't jailbreak.
7. Apple keeps a record of all your free purchases so if you restored your device to factory or erased everything all you need to do is login to itunes and view your purchases and choose which one you would like to sync. hassle free!
8. You can change your account details anytime, even change your country location.
9. You can create as many Apple ID as you like and set different locations for each.
10. Having different location means more apps! US app store has more apps not available here locally in the Philippines.
11. You can transfer your purchases to another device or computer via iTunes.
Requirements
1. Valid email address that has never been used to create an Apple ID before.
2. Internet Connection
3. PC Windows XP/Vista/7 or Mac OSx 10.X
4. iTunes 10.X or later
5. Pair of Eyes and a Brain to fully understand and follow what he is reading. (COMMON SENSE)
Steps (Please take note of items highlighted in yellow, red arrow and other indicators)
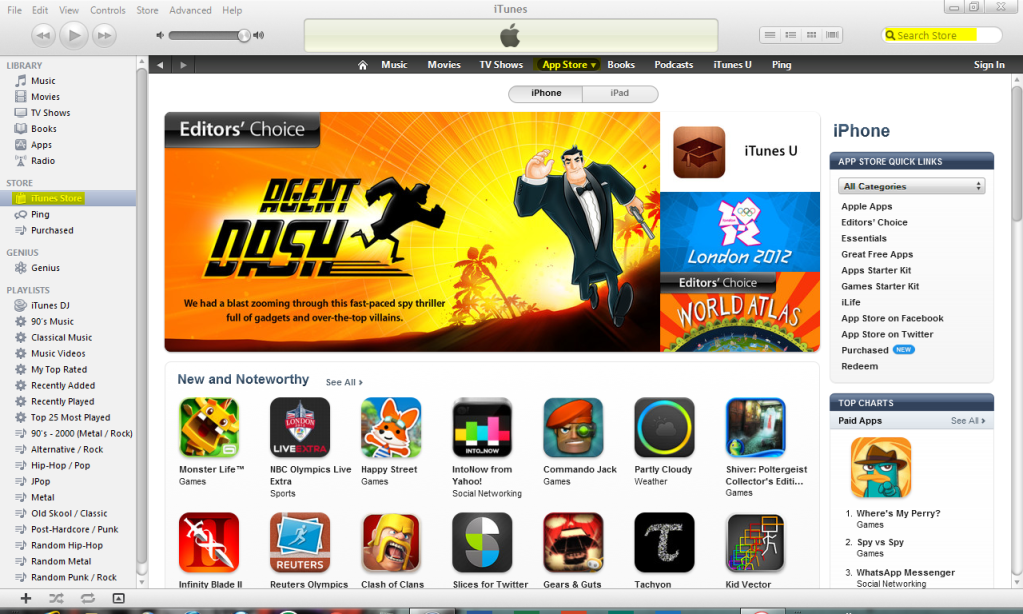
Launch iTunes and click iTunes Store and wait for it to load then click App Store.
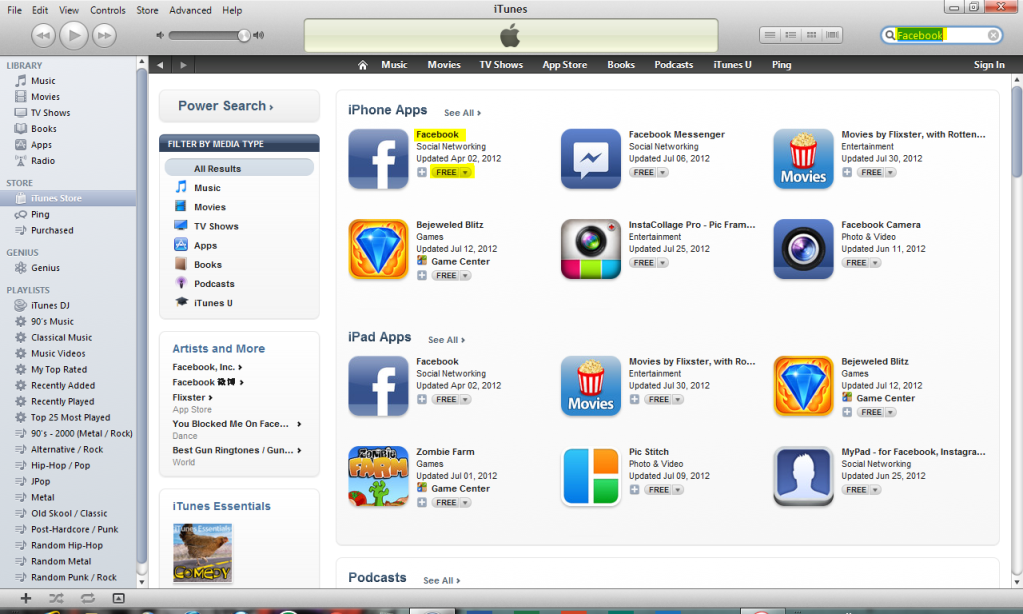
After App Store loads, search for Facebook using the search field on the upper right and wait for the search results. Click the FREE button below the Facebook icon.
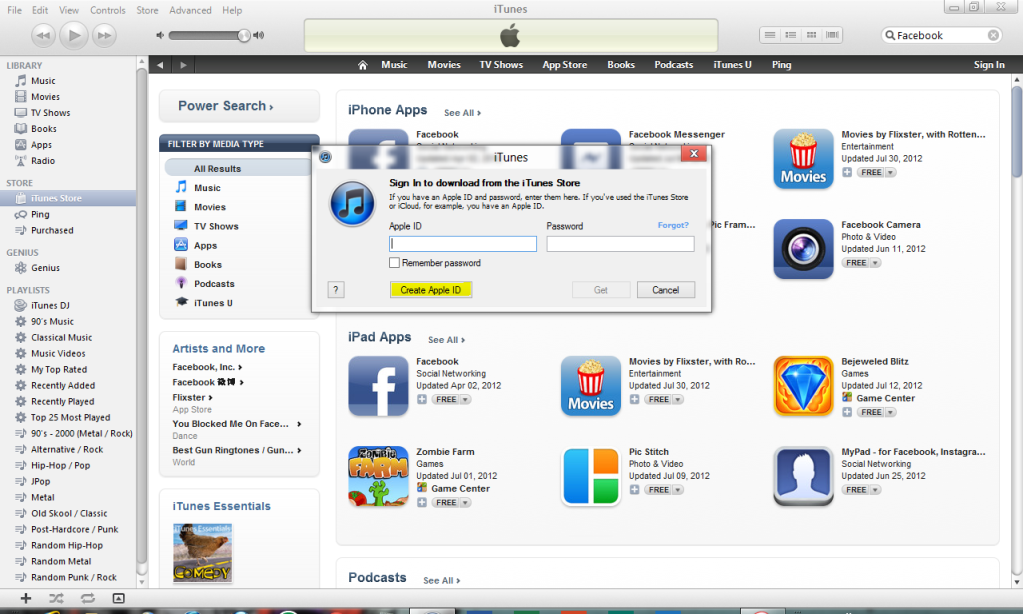
On the pop-up window click Create Apple ID and wait for the page to load.
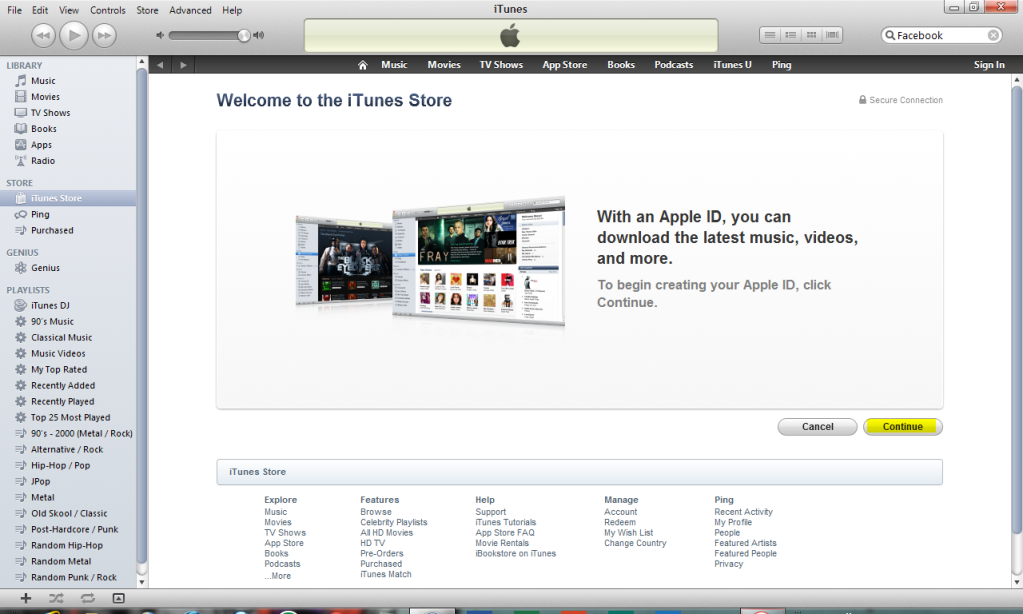
Click the Continue button to start creating your Apple ID.
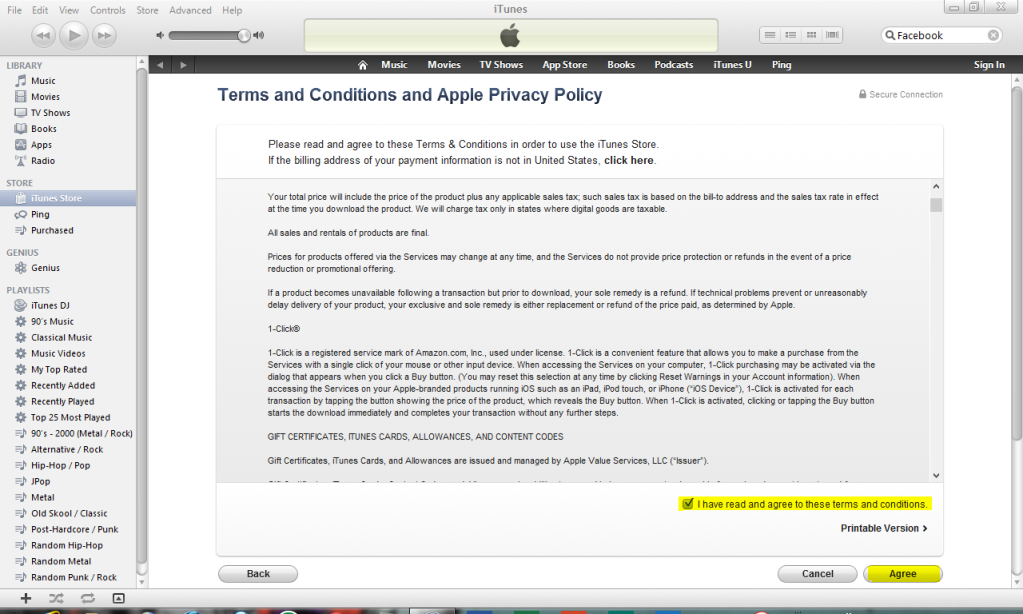
Place a check mark on the box beside "I have read and agree to these terms and conditions" and clickAgree.
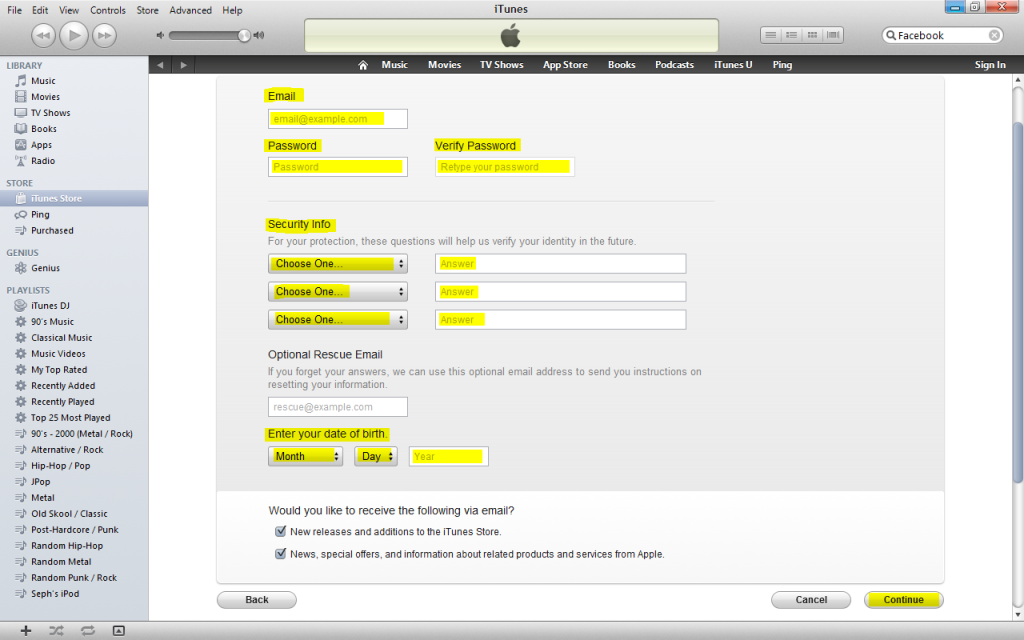
Fill out the necessary fields highlighted in yellow and do not leave anything blank except for the optional email if you choose not to have one, then click Continue.
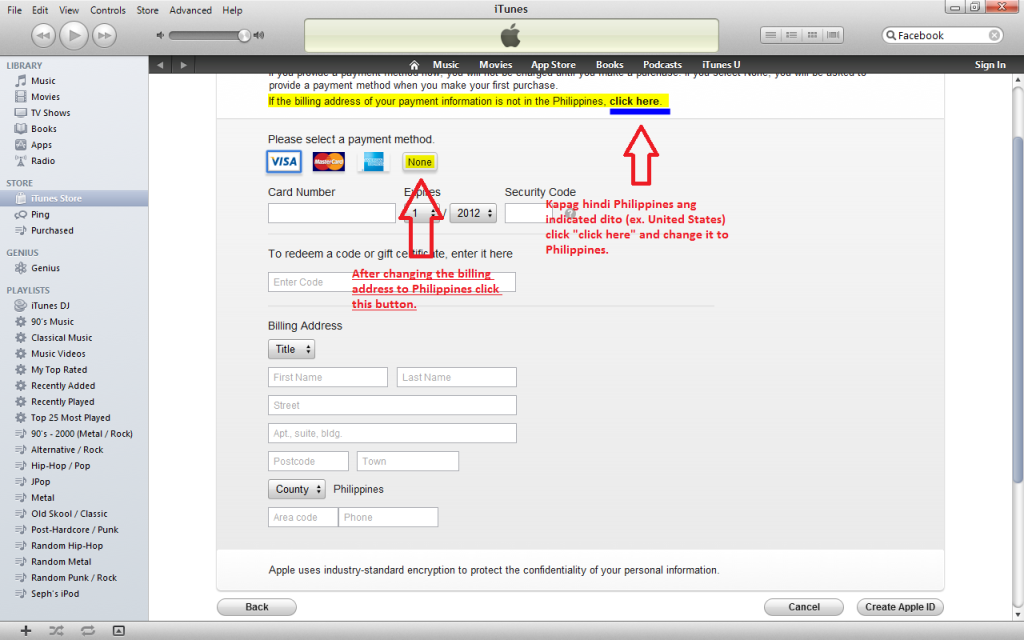
Check the billing address, if Philippines is not indicated change it and click NONE and wait for the page to refresh. Refer to screenshot below.
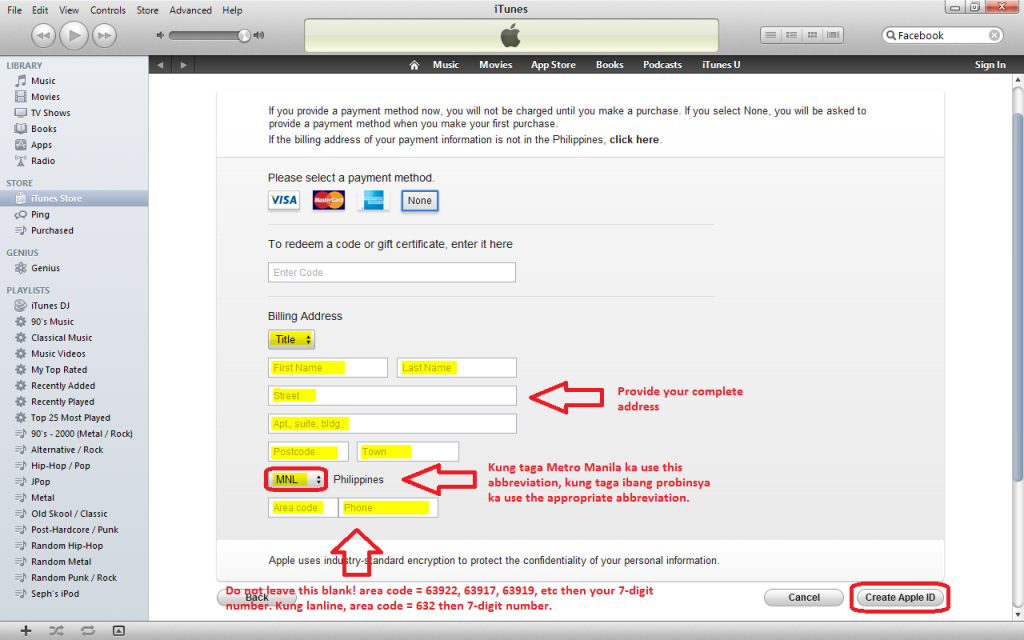
Fill out the necessary fields and click create Apple ID. Refer to screenshot below.
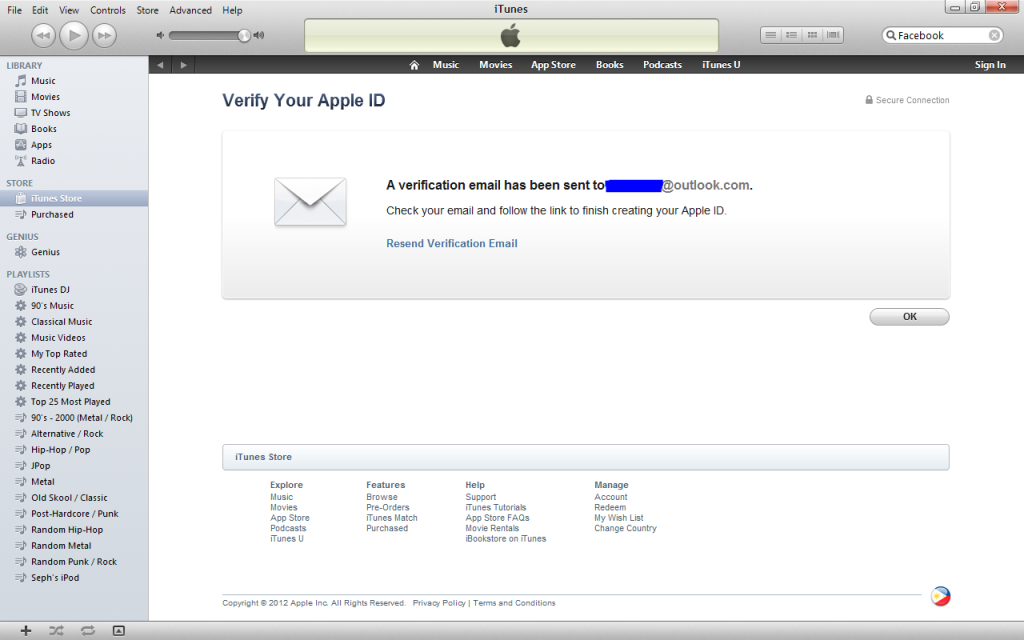
You will be prompted to verify your email address, simply access your email and click the verification link which will take you to the verification page.
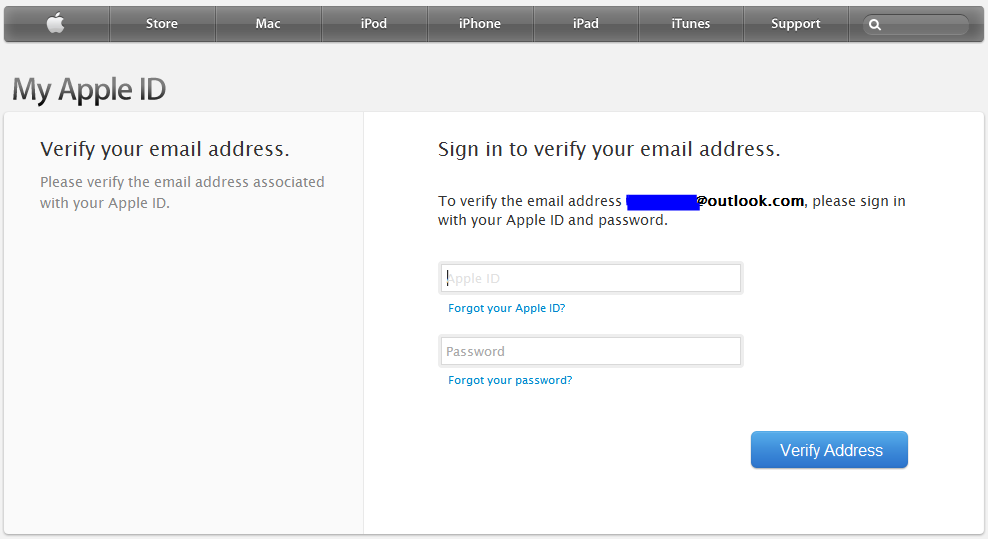
On the verification page, login using your Apple ID (email address used to create the apple ID) and password.
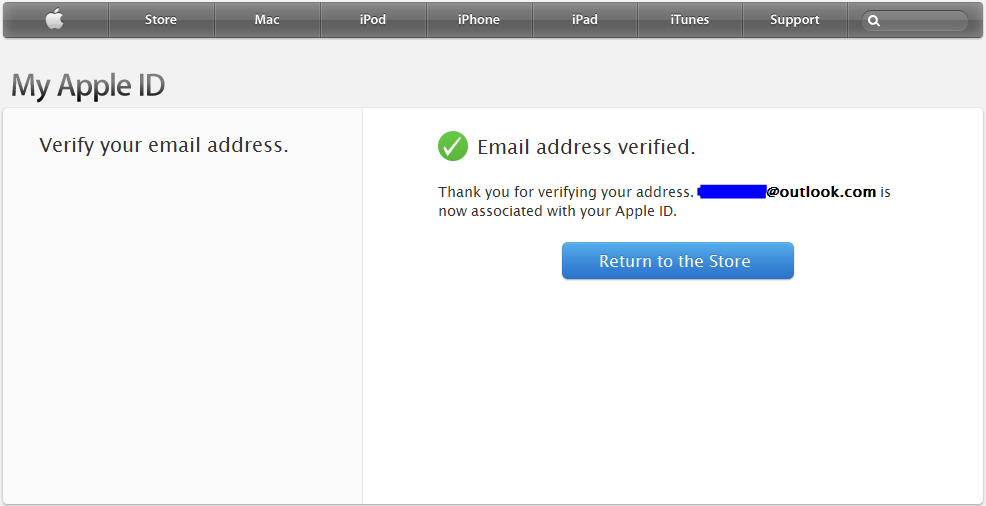
Click Return to the Store and your browser will prompt you to launch the iTunes application, otherwise it is automatic or go back to iTunes.
You will be prompted by iTunes that your Apple ID has already been verified and is automatically signed in to iTunes.
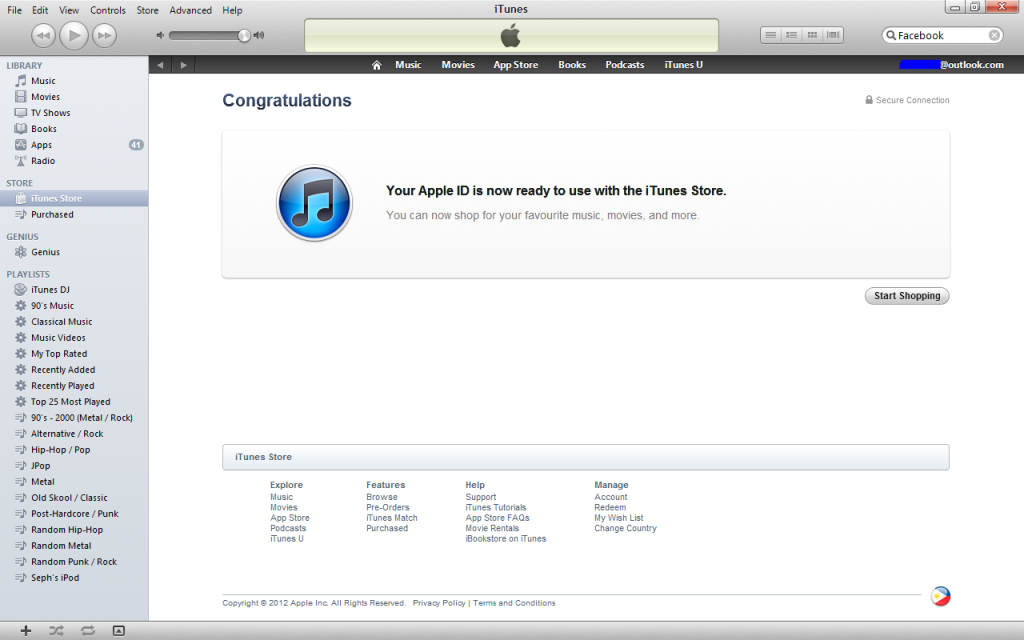
Congratulations you have successfully created a free Apple ID!
Post a Comment